User Manual for BoxBilling Registrar Plugin
MrDomain
This is the user manual for the BoxBilling Registrar Plugin from MrDomain.
This plugin adds to BoxBilling capabilities to register, transfer, and renew domains through the MrDomain's API. It also adds capabilities to manage nameservers and domain contacts directly from BoxBilling.
The BoxBilling Registrar Plugin from MrDomain uses MrDomain's API to work. You need an active API account in order to use this plugin.
To enable the plugin you will need an API Username and an API Password that you will have obtained from MrDomain's support team. For more information on MrDomain's API, check the documentation.
BoxBilling is a registered trademark of BoxBilling. MrDomain is not part or is otherwise affiliated with it in any way. For more information on BoxBilling's software, visit its official website.
To install the plugin, download the ZIP file from our Github repository. Once downloaded, unzip it
and you should end up with a folder named dondominio. Copy the folder's content (not the
folder itself) to the registrar folder in BoxBilling. This directory is usually
/path/to/boxbilling/bb-library/Registrars/Adapters.
Once uploaded, access the BoxBilling's administration panel and go to Configuration > Domain
registration. Click on ![]() ,
look for
,
look for DonDominio on the list and click on ![]() to enable
it.
to enable
it.
Once enabled, click again on Configuration > Domain Registration, and then on
![]() . Find
. Find DonDominio in the list and click
on ![]() to access the plugin's configuration screen.
to access the plugin's configuration screen.

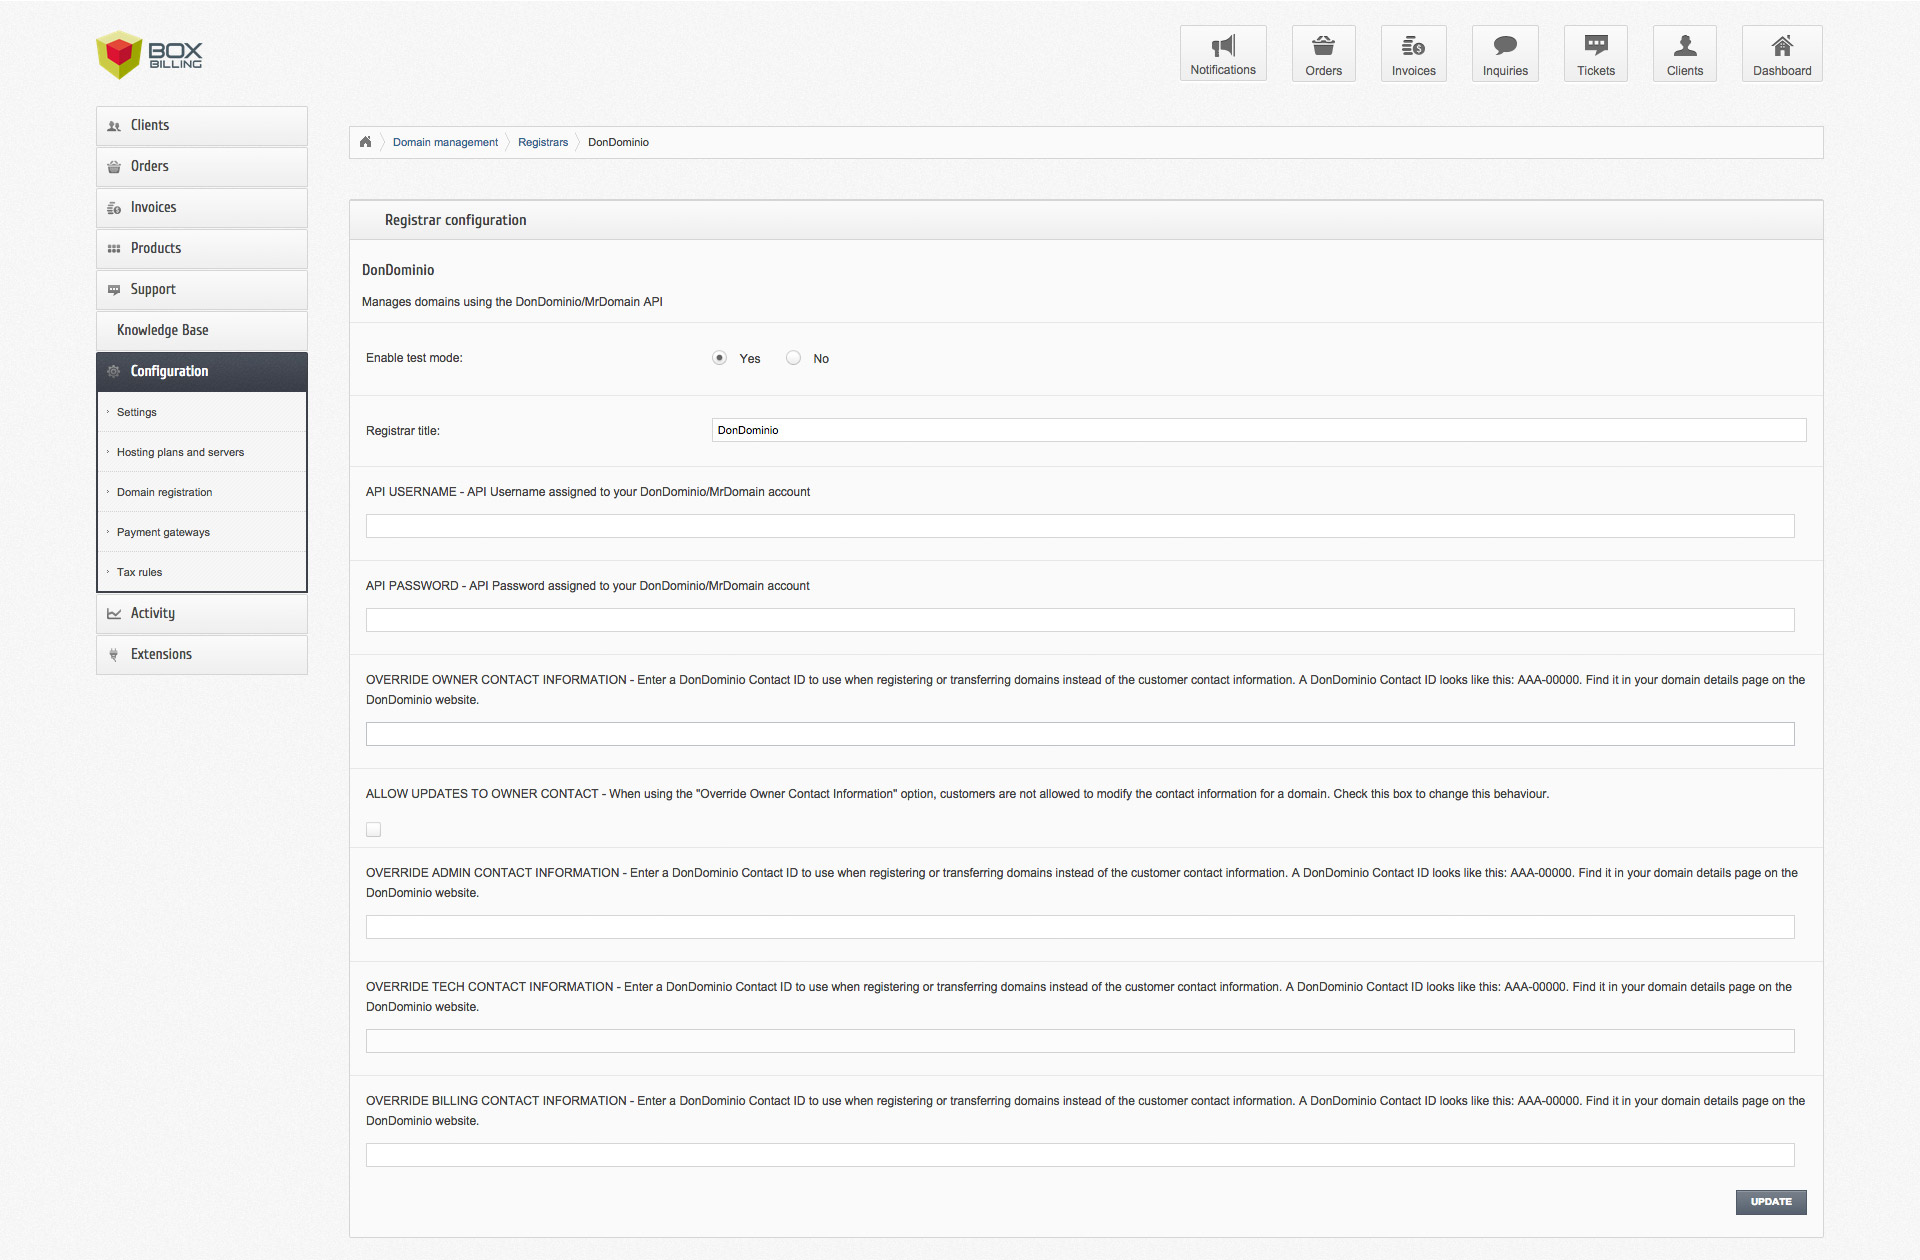
In this screen you'll find several options, including the following ones:
Enable test mode: Make sure it's set to No.
Registrar title: Enter DonDominio.
API USERNAME: Enter your API Username.
API PASSWORD: Enter your API Password.
When done configuring the plugin, make sure to click on ![]() to apply the changes.
to apply the changes.
After those fields you'll find 5 more. You can use them to overwrite contact information provided by your customers. Enter a MrDomain Contact ID in each corresponding field you want to overwrite. The Plugin will use information from that Contact ID for all registrations and transfers instead of the typed information. If you want your customers to be able to edit the information you provided later, check the corresponding checkbox. If not, they won't be able to modify the contact information provided by you.
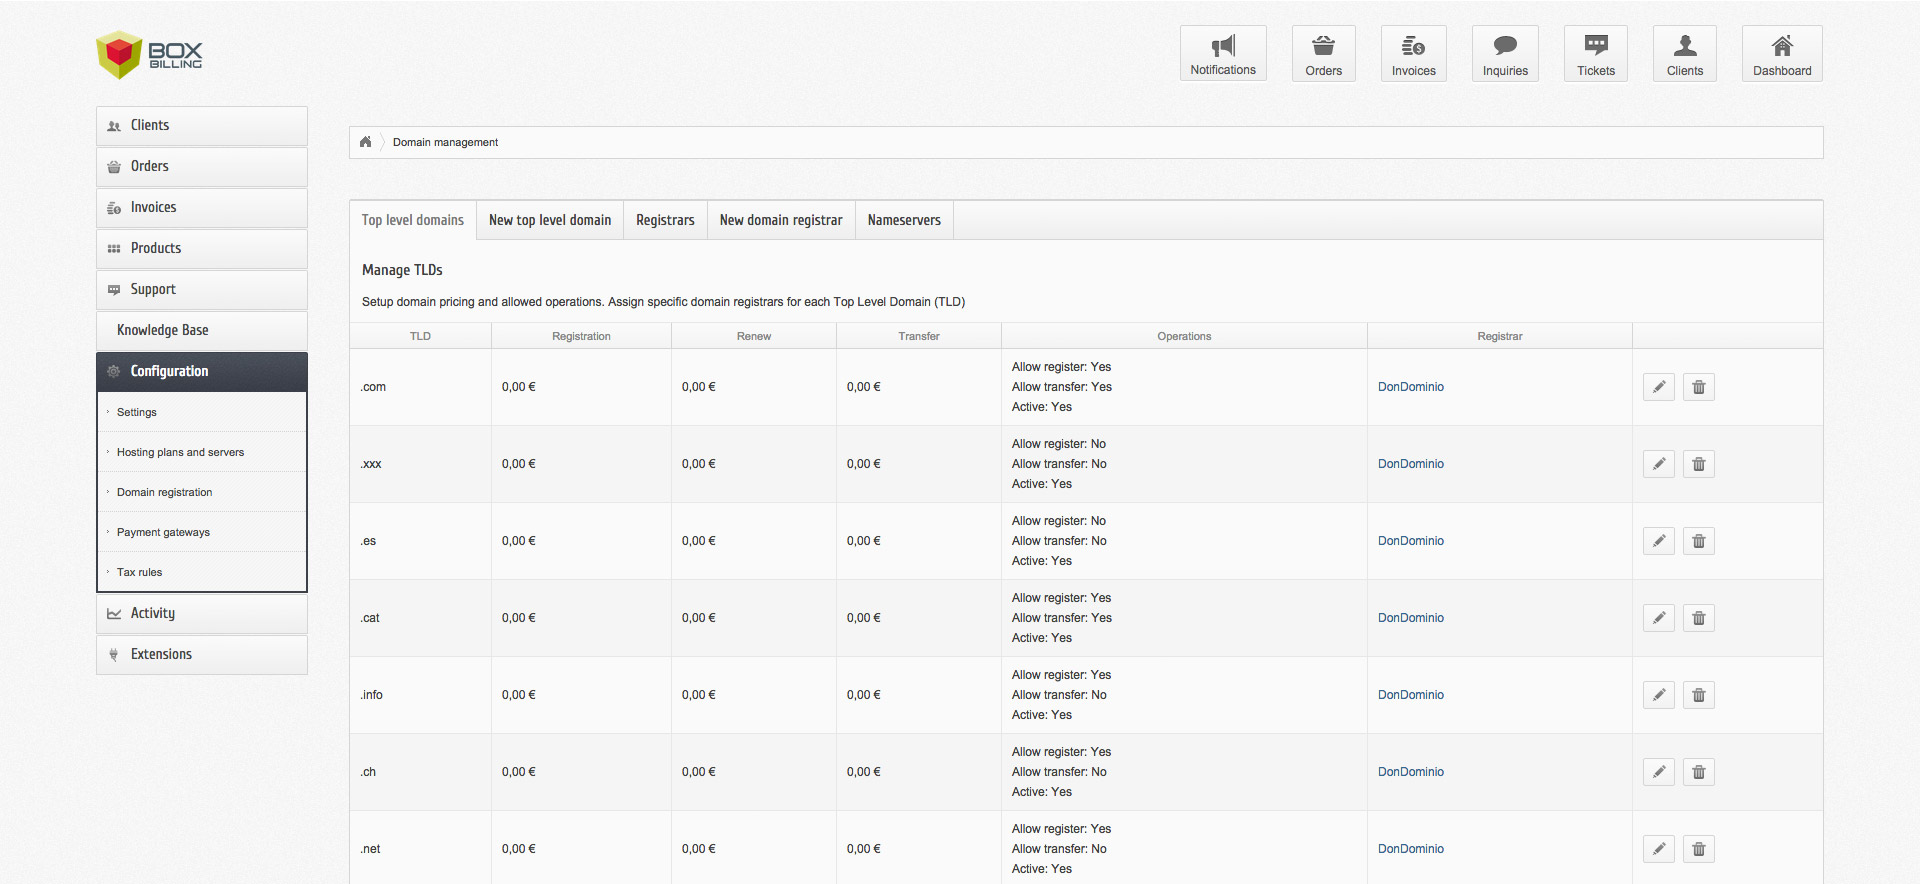
From the sidebar, click on Configuration > Domain Registration. You will find a list with all
the TLDs you have configured in your BoxBilling installation.

To use them with the registrar plugin, you have to edit and configure them to use it. To edit an
existing TLD, click on the ![]() icon an you will see a
configuration screen.
icon an you will see a
configuration screen.

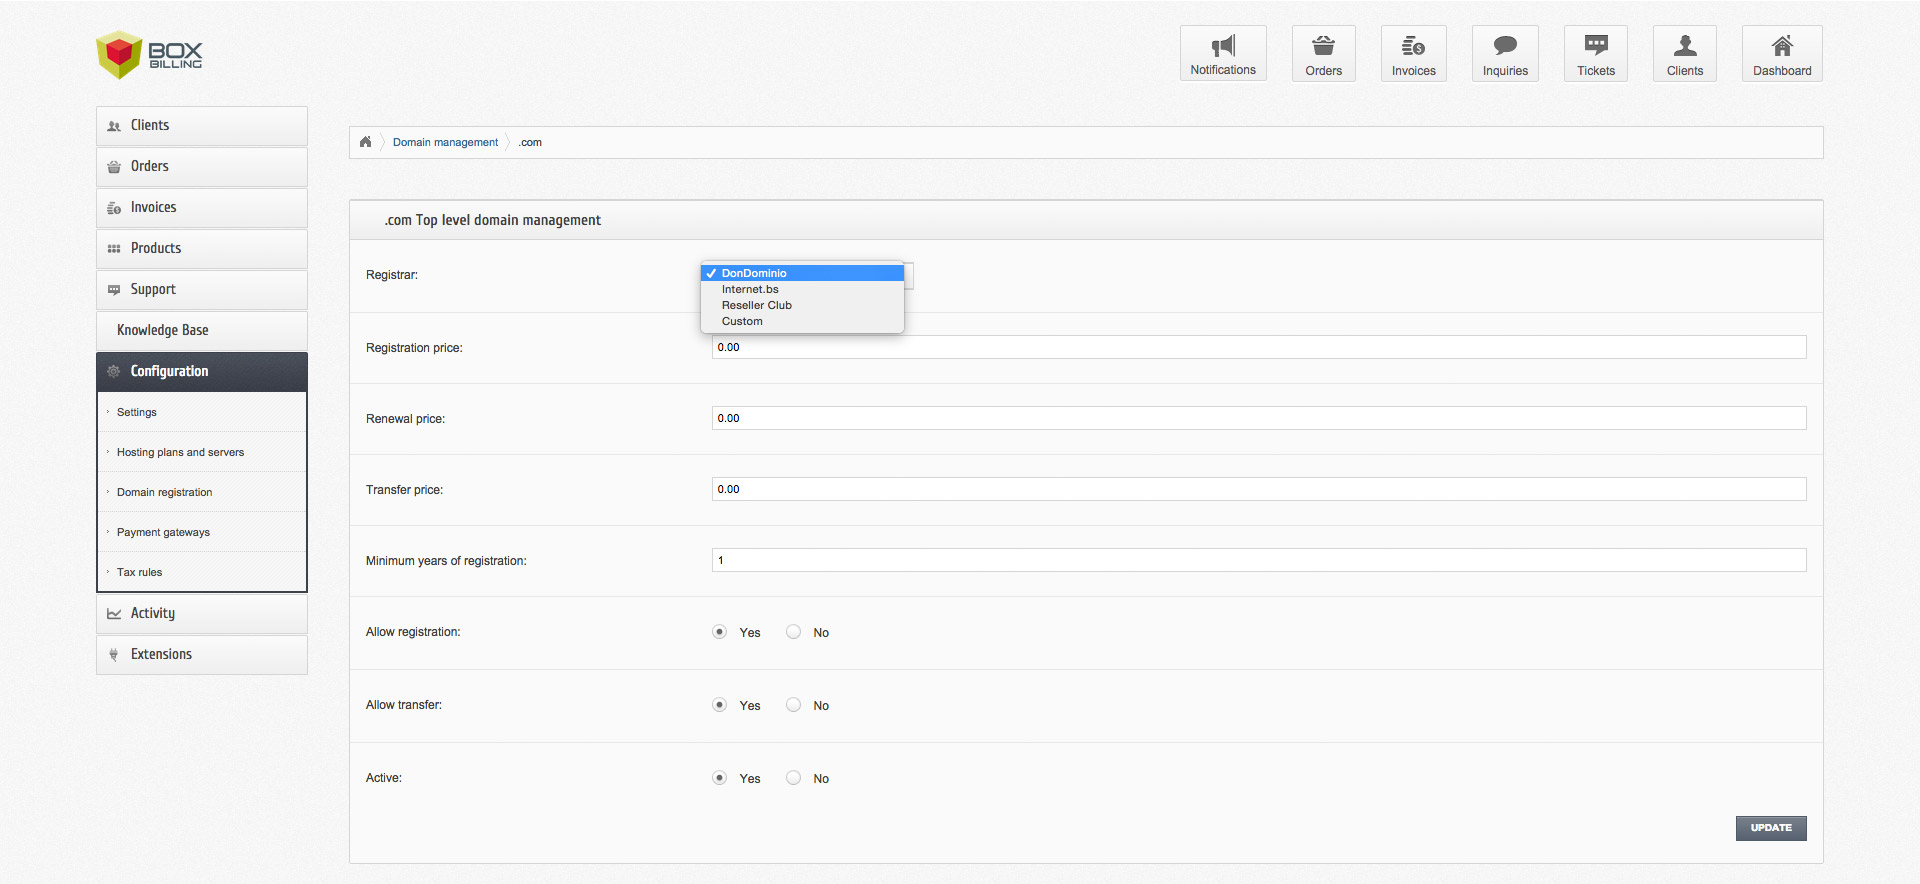
From this screen, click on the Registrar dropdown, find DonDominio in the list and select it.
Click on ![]() at the bottom of the screen to save changes.
at the bottom of the screen to save changes.
To create a new TLD and use it with the plugin, go to Configuration > Domain Registration and
click on ![]() and fill the form. You will
find the
and fill the form. You will
find the Registrar dropdown just like in the edit screen. Click on it, and select DonDominio
from the list. When you're finished, click on ![]() .
.
Now your TLDs are ready to be used with the BoxBilling Registrar Plugin from MrDomain.
Some TLDs required additional fields to register and transfer domains. To add
these fields to BoxBilling, you will need to edit the HTML code in the
registration and transfer forms. You can find this file on
path/to/boxbilling/bb-modules/Servicedomain/html_client/mod_servicedomain_order_form.phtml.
You will find an example on
BoxBilling's Github repository.
Check the MrDomain's API documentation to know which fields you need to add. They have to be named the same than in the documentation. They will then be automatically collected when registering and transferring domains.